
Using RStudio as an educator:
Building a package
Pre-requisites:
What you’ll learn:
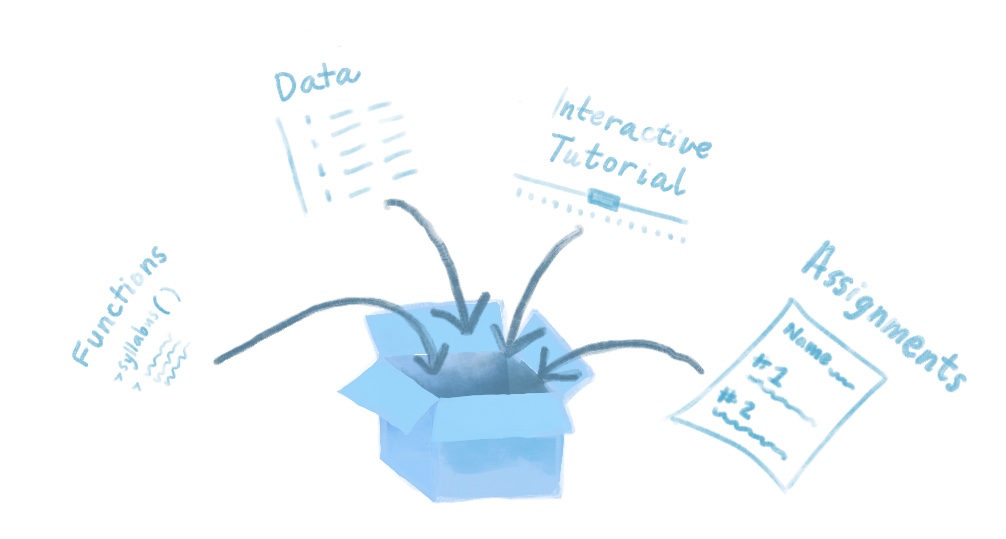
As an educator you can use a package to easily deliver the contents of your lesson/ teaching material/ data to an audience. Your package doesn’t have to be on CRAN, and it doesn’t have to contain functions (but it can if you want!). Packages can be used creatively so that you can give your students custom data sets to work with, R Markdown “worksheets” that they can fill in or use as templates for completing exercises. You can also have students run LearnR tutorials with a package. These are interactive R Markdown docs that use Shiny.
Here we will make a bare bones package that is educator-ready. The final goal will be to create a package that is “downloadable” by your students which means this package needs to have a GitHub repository so that it can be easily shared.
If you’re a beginner when it comes to integrating RStudio and Git, then the clearest way to begin making our package is by creating a GitHub repository for our package-to-be and then creating our project in RStudio afterwards. Follow the instructions in the “New project, GitHub first” chapter of Happy Git with R to link your new repo with RStudio, and keep in mind the following as you do so:
What’s in a name? It’ll be easiest if you give your GitHub repository the same name that you’d like to give your package. It will make things less confusing. As such, the name you choose must 1) include only letters, numbers, or
., 2) start with a letter, and 3) not end with a.Optionally, you can also consider the naming tips here.
Where to put this project directory? Make sure your project directory that we will use to make this package is not nested within any other projects, folders, or repos. It should be its own thing.
Below, we distill the more comprehensive resource R packages down to the basics. Now that your GitHub-connected project has been created, it’s time to put in the scaffolding for our bare-minimum package, which will primarily consist of the addition of specific folders and files to our project directory.
Though we could do this manually, it’s much easier to rely on helper functions from the usethis package to do this for us.
#install.packages("usethis")
library(usethis)
Specifically, we use the create_package() function to create the folders and files we need in the directory of our choosing. Its argument is the path (and consequently, also the name) of our package. Since we are already in the project directory that we’d like to use, we can replace the path with getwd():
[IS THIS HACKY?]
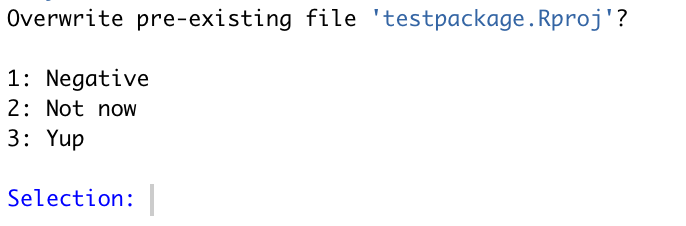
create_package(getwd())The console output will ask if you’d like to overwrite the pre-existing R project. Select No.
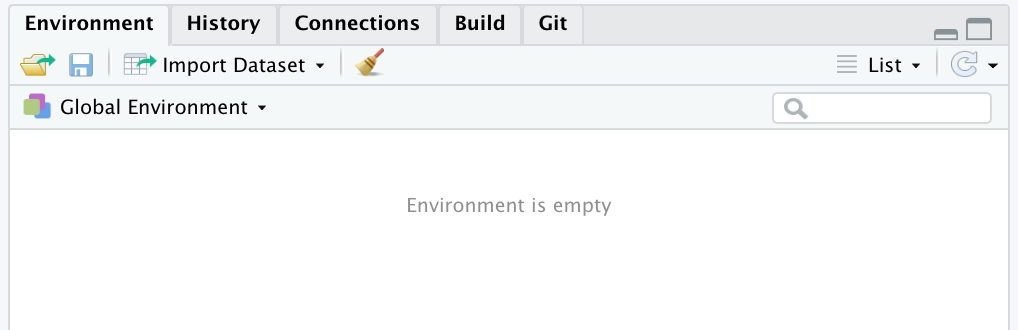
A new session of RStudio will open, which will appear almost duplicate to the one you had open previously with one important difference: this new one has a Build tab in the pane which also has the tabs Environment, History, etc. This tab is specific for building packages, and we will use it later. You can close the other RStudio instance.
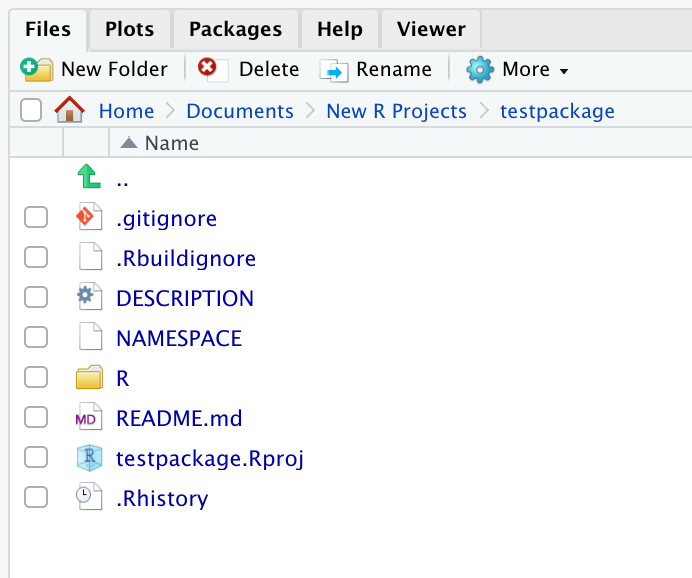
You can now confirm that create_package() has created some new files which we see in our Files pane:
It is a good idea to commit to GitHub at this point.
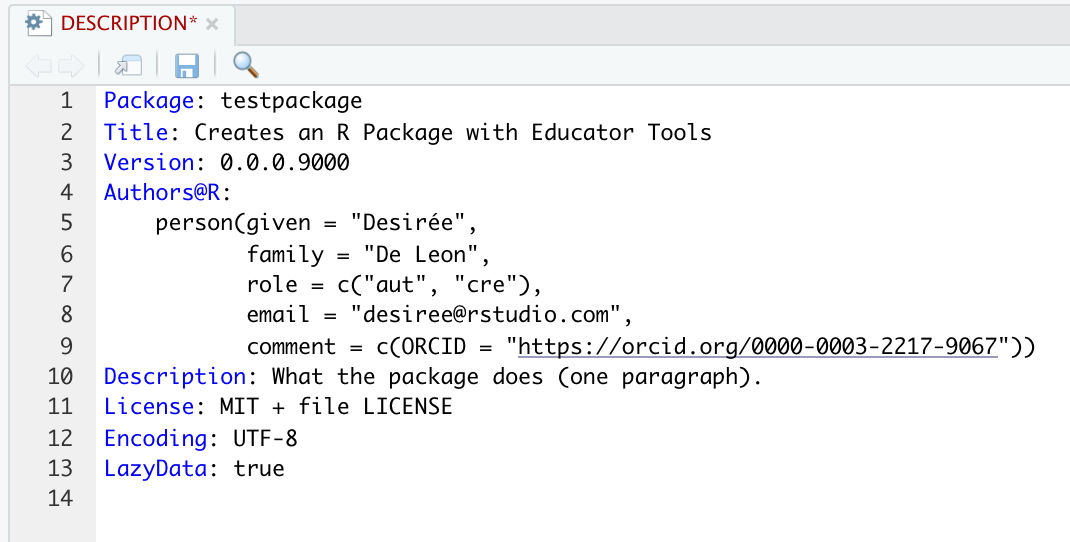
You can also edit the DESCRIPTION file to fill in the author (your) info and other descriptive info about the package:
[Commit again]
FYI: At this point in package-making is when you could begin to create custom functions if you wanted to (e.g. as described here and here, but this is not a goal of the present tutorial).

[SHOULD WE IGNORE THE CHECK STEP FOR NOW?]
[IS LOADING DEVTOOLS ACTUALLY NECESSARY FOR THIS NEXT STEP?]
The minimum package structure is in place, and now we go to Build > Install and Restart to make the package “official”. And you’re done!…well, kind of. Your package doesn’t have anything useful in it (yet), but it does exist.
[BETTER TO FIRST SUGGEST “LOAD ALL”?]
Anyone can now install your package with the following code, substituting the field in quotes with your own GitHub username and package name:
# install.packages("remotes")
remotes::install_github("rstudio4edu/testpackage")
We next demonstrate how to include custom data in package.
Assuming you have followed the previous steps for building the basic structure of a package, we now demonstrate how to package up some data for your students.
What if you’d like your students to work with a specific data set? Should you email them an excel or .csv file or upload it onto an oustide learning platform? No! You can include data sets in your package, ready to be summoned with the call of an object name. This saves precious instruction time that might otherwise be wasted and also helps students get to the fun stuff (analysis!) faster.
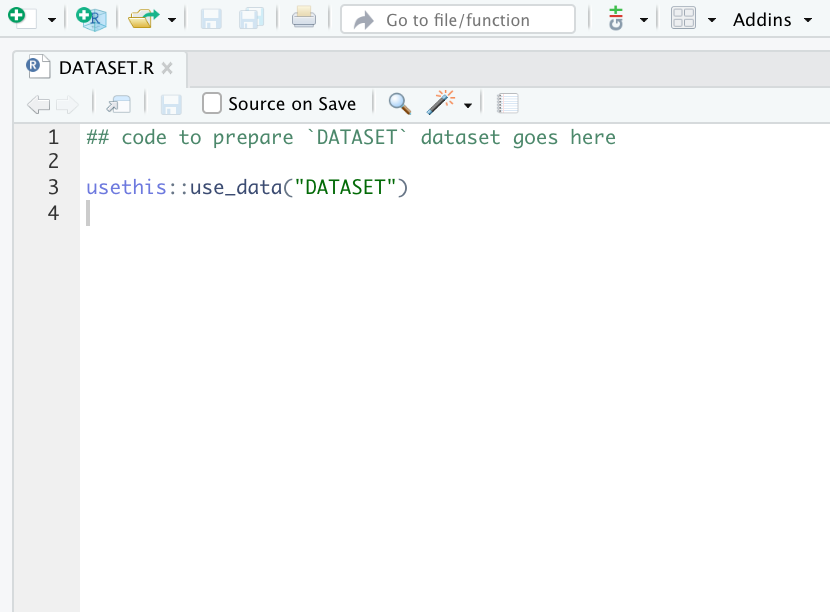
usethis::use_data_raw to create a folder called data-raw. We will use this folder as a general storage space for any raw data files, data pre-processing scripts, etc. that we don’t want to be built into our final package.use_data_raw()This new folder houses a DATASET.R script.
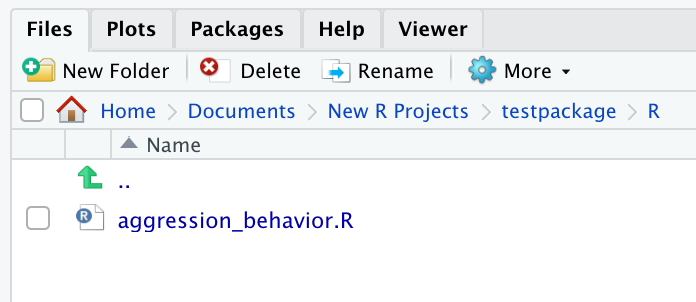
data-raw folder. I am adding a .csv file called aggression_behavior.csv.
Note: It’s always a good idea to start with the most unprocessed, messy version of the data in the
data-rawfolder along with scripts to clean it up, so that your workflow is reproducible.
data/Edit the DATASET.R script:
.csv file containing our raw data.usethis::use_data() which will export an .rda-formatted data file to a new folder, data. Any data in this folder will be accessible to the user.[SHOULD WE MENTION ANYTHING ABOUT HERE::HERE?]
## code to prepare `DATASET` dataset goes here

# Read in your .csv file
aggression_behavior <- readr::read_csv(here::here("data-raw", "aggression_behavior.csv"))

# Include any processing steps here as well

# Export to `data/` as .rda file
usethis::use_data(aggression_behavior, overwrite = TRUE) # add overwrite option
FYI: The reason .rda (also called .RData) files are use in packaged data sets is because this data file format is much faster to read in than .csv files.
Your data is now callable! Check that you can access your data.
Build > Load Allaggression_behavior
# A tibble: 214 x 11
focal compound birthyr obyear rank `infant?` attack_all chase_all threatcontact_a…
<chr> <chr> <dbl> <dbl> <dbl> <chr> <dbl> <dbl> <dbl>
1 bs9 a1 2003 2008 3 N 0 0 0
2 gk3 a1 1991 2007 1 Y 0 0 0
3 se8 a1 2001 2008 1 N 0 0 0
4 qq8 a1 2001 2008 3 N 0 0 2.23
5 vd8 a1 2001 2008 3 Y 0 0 0.998
6 qv5 a1 1996 2008 3 Y 0 0 0
7 sr8 a1 2001 2008 2 N 0 0 0
8 pk8 a1 2001 2008 2 Y 0 0 0
9 oz4 a1 1994 2008 1 N 0 0 0
10 hv5 a1 1996 2007 2 N 0 0 0
# … with 204 more rows, and 2 more variables: threatnocontact_all <dbl>, agg_in <dbl>
> Note: If you later decide to update the underlying raw .csv file, you will have to manually run the script in Step 2 again before re-building, loading, installing the package. The reason is that when packages are built, loaded, installed, etc., any contents in data-raw/ are ignored by default.
Because this will be a data set that is shared with others, it’s important to add reference documentation for it.
usethis::use_r() with your data set name in quotes.use_r("aggression_behavior")This generates a .R script that lives in the R/ folder.
Add information about the data set:
(No “roxygen skeleton for data sets?”
This is what will become our documentation.
#' Data of aggression behaviors observed in rhesus macaques
#'
#'
#'
#' @format A data frame with 214 rows representing individual "focal" rhesus and 11 variables:
#' \describe{
#'   \item{focal}{character denoting the subject ID of the rhesus}
#'   \item{compound}{a character indicating the social group the focal belongs to}
#'   \item{birthyr}{dbl denoting focal's year of birth}
#'   \item{obyear}{dbl denoting year of behavioral observation when data were collected on the focal}
#'   \item{rank}{dbl denoting high, middle, or low social rank of the focal (1, 2, or 3)}
#'   \item{infant?}{character denoting whether or not the focal had an infant less than 1 year old during time of observation}
#'   \item{attack_all}{average number of times an attack was intitiated by the }
#'   \item{chase_all}{a character string giving given name}
#'   \item{threatcontact_all}{a character string giving given name}
#'   \item{agg_in}{number of times aggression was initiated by the focal}
#' }
#' @source aggression_behavior.csv file
"aggression_behavior"
Note: To read more about Roxygen comments, check out 6.3 Roxygen Comments, R Packages.
devtools::document() to make the roxygen comments “concrete”.#install.packages(c("devtools", "roxygen2"))
library(roxygen2)
library(devtools)
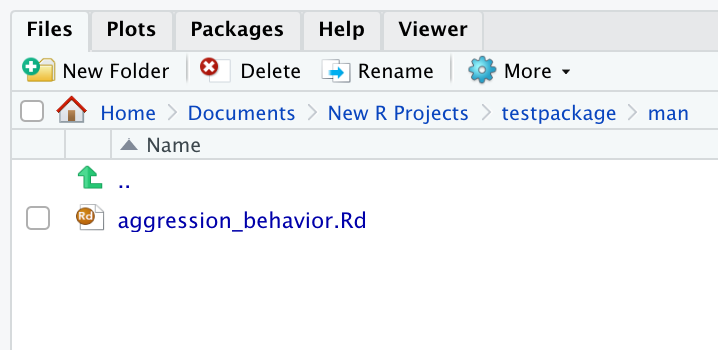
document()This generates a .Rd file, that makes our documentation accessible to the package. [PHRASING?] This file lives inside a newly-generated man/ folder.
Now we can check that our documentation works:
? aggression_behavior, substituting the name of your data set.document() again until you’re satisfied.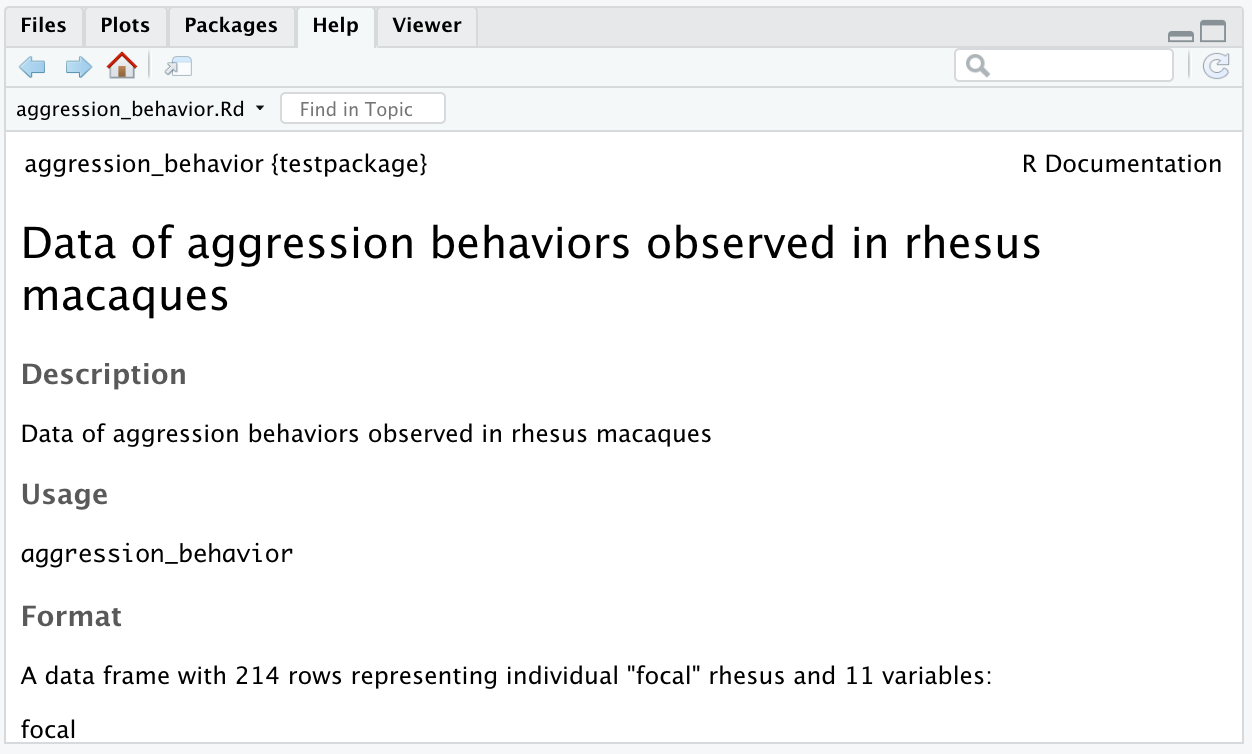
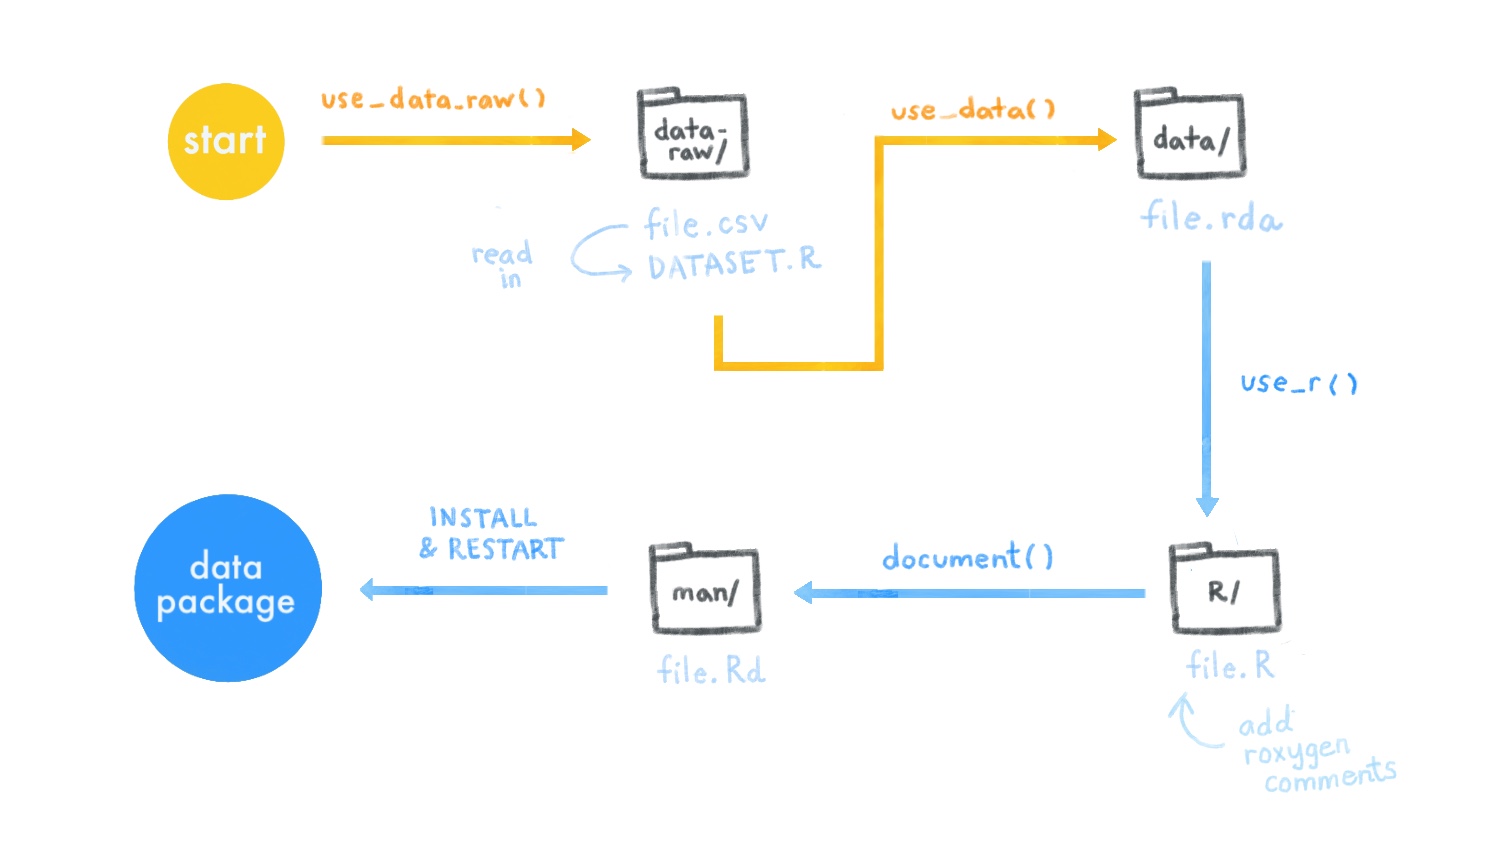
Install and Restart under the Build tab.Here’s a review of all the data package steps so far:
Congratulations, your package now includes a documented data set! It can be downloaded and installed as recommeded in Step 5: Deliver of Part 1.
If you’d like to create a worksheet-like component for your package, continue with Part 3. Otherwise, skip to Final Steps for some recommendations on a couple final (and optional) package components.
An .Rmd template is essentially the replacement for a worksheet. It is a partially-filled out R Markdown file that you can create. You can create a template for every homework assignment or exercise that you want your students to work through. And they can access all of these templates easily when they go to File > New File > R Markdown. And then select From Template from the dialogue box menu. Your custom R Markdown template will appear there.
You can make a couple templates for general use cases (e.g. “Homework”, “Reports”, “Final Project”) or you can make as many very specific templates populated with questions or tailored excercies (e.g. “Lesson 1 Excerices”, “Problem Set 2”).
As a rough outline, to make your first template you will:
use_rmarkdown_template() to create the necessary directory and file structure within your package.[DESCRIBING THE SPECIFICS OF RMARKDOWN BASICS IS OUTSIDE OF THE SCOPE OF THIS TUTORIAL. NEED TO LINK TO GOOD BASIC RESOURCE FOR THIS]
I assume you have already created the basic package infrastructure from Part 1.
use_rmarkdown_template(template_name = "<your-template-name")use_rmarkdown_template(template_name = "Worksheet1")
✔ Setting active project to '/Users/desiree/Documents/New R Projects/testpackage'
✔ Creating 'inst/rmarkdown/templates/worksheet1/skeleton/'
✔ Writing 'inst/rmarkdown/templates/worksheet1/template.yaml'
✔ Writing 'inst/rmarkdown/templates/worksheet1/skeleton/skeleton.Rmd'
> This creates a new folder in the root package directory inst/ with several subdirectories.
skeleton.Rmd inside inst/rmarkdown/templates/<your-template-name>/skeleton/. This is what you’re users will see. consider what you’d like the output format to be.
template.yaml file in the parent directory skeleton/. But this is not critical to getting the template into the package.Build > Install and Restart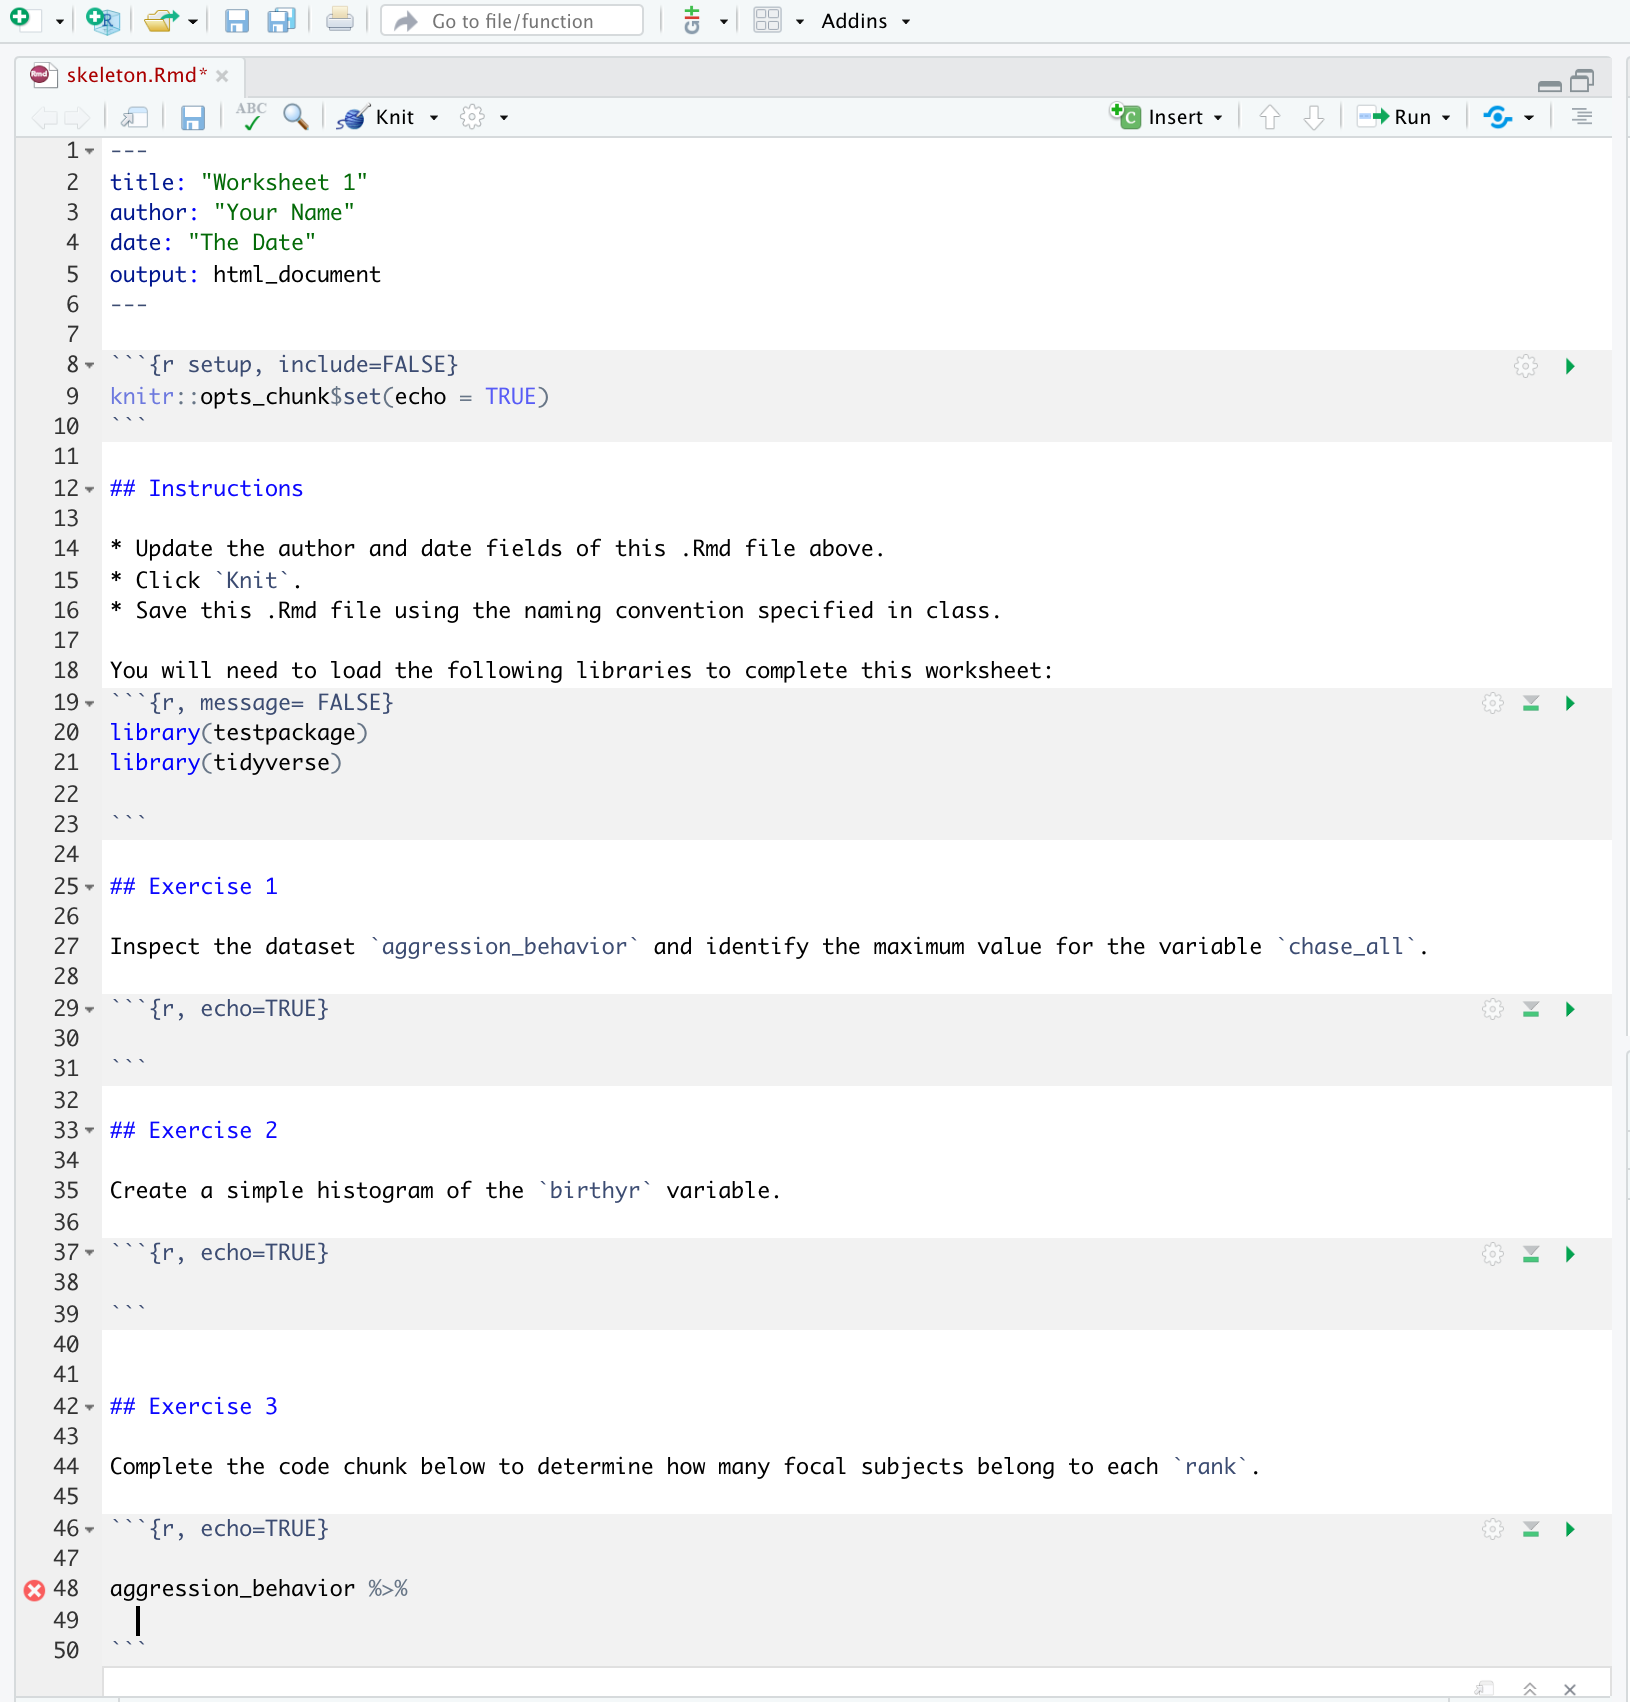
You can get ideas for how minimal .Rmd templates can be customized by checkout out a few example templates here.
File > New File > R Markdown. Select From Template from the dialogue box menu. Your custom R Markdown template will appear there. Voilà!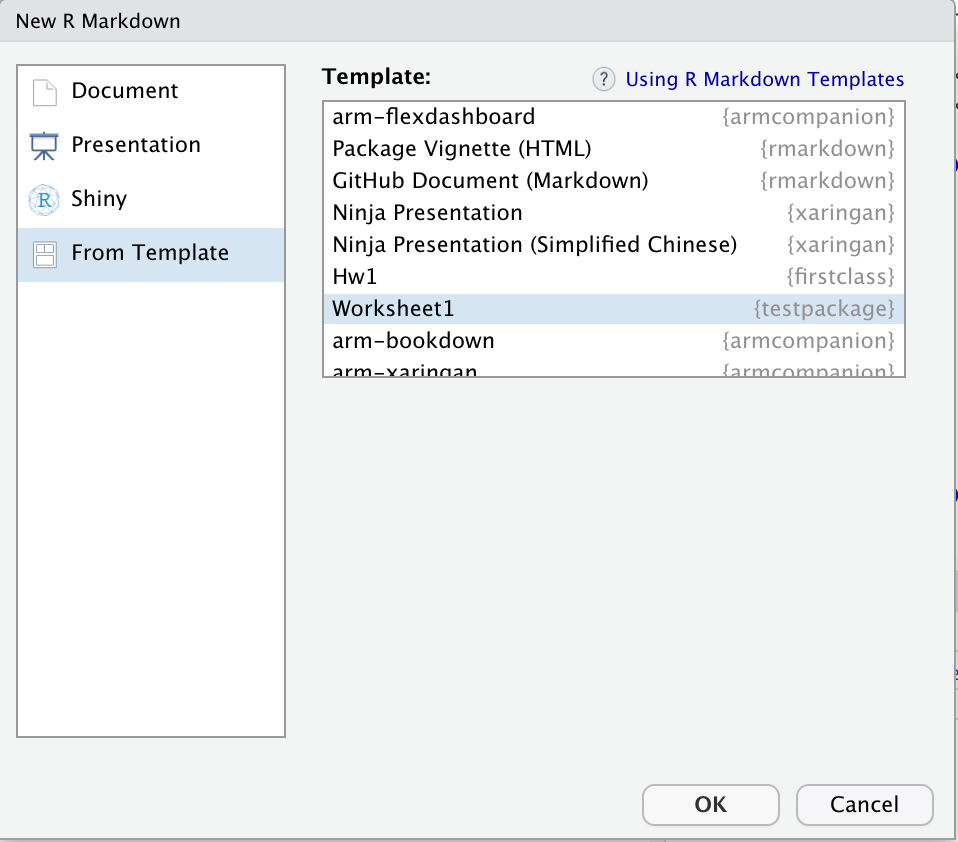
Tip: You can continue to add new .Rmd templates to your package throughout your course. When you do, ask students to update the package, and they will access to the new templates.
[INSERT DAVID MEZA QUOTE]
We next show you how you can introduce a special type of .Rmd document in your package: a LearnR tutorial.
LearnR tutorials are interactive R Markdown documents that allow you to incorporate code exercises as well as elements like videos and quizzes. There are many possibilities, and we point you to other resources to see various examples of these tutorials in action. The nice thing about this tool is that students can play around with code and preview various concepts outside of the RStudio IDE. One possible use case would be when you would like to introduce broader concepts in an interactive way before students begin focusing on the programming and coding aspects of the concepts within a regular .Rmd document.
As before, I assume you have at a minimum created the basic package structure from Part 1.
learnr packageuse_tutorial("<name-of-tutorial-file>", "<title-you'd-like-the-user-to-see>", open = interactive())remotes::install_github("rstudio/learnr")
use_tutorial("Lesson1", "My Title", open = interactive())This adds a tutorial folder to the inst directory.
.Rmd file inside the tutorial folder is automatically opened. Edit it to customize your tutorial content.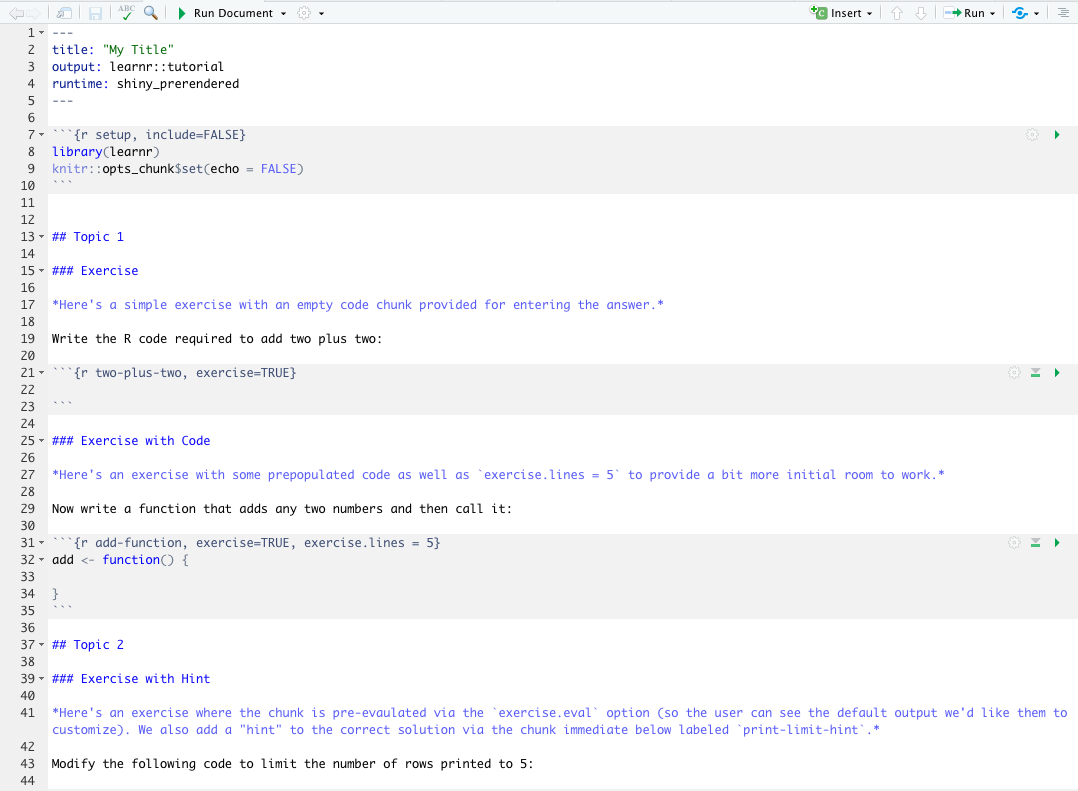
Run Document next to the little green arrow in the toolbar of the .Rmd file.
.html file in the same directory as the tutorial .Rmd file and also run your tutorial locally.At the time of writing, there is one additional folder that needs to be added, which use_tutorial did not create for us.
tutorials/, add a new folder with the same name as your .Rmd tutorial file..Rmd file and the .html for your tutorial into this new folder.Build > Install and Restart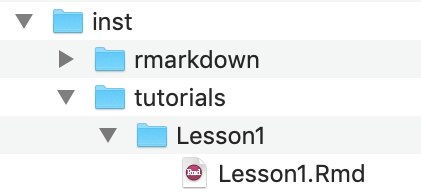
run_tutorial("<tutorial-name>", "<package-name>").learnr::run_tutorial("Lesson1", "testpackage")The above line of code is also how your users will be able to run your tutorial once they have installed your package.
If you get errors, double check that your structure for the tutorial folders and files matches that of those in the testpackage repository. Make sure you Build, Install, and Restart before trying again.
We created documentation for the data set, but not for the package overall. To do so:
usethis::use_package_doc()R/ with roxygen-style comments
document() to update the documentation#install.packages(c("devtools", "roxygen2"))
library(roxygen2)
library(devtools)
document()? <package-name> substituting your own package name.You can include additional information in a README.Rmd file for your package. At a minimum, you should include a line about how to install, using the guidelines from Part 1: Deliver.
use_readme_rmd()> use_readme_rmd()
✔ Writing 'README.Rmd'
✔ Adding '^README\\.Rmd$' to '.Rbuildignore'
● Modify 'README.Rmd'
✔ Writing '.git/hooks/pre-commit'Knit, so that it updates the corresponding README.md fileIf you run into rough patches, here are some common pitfalls that might be resulting in errors:
usethis package.# install.packages("devtools")
devtools::install_github("r-lib/usethis")usethis::use_github()You can find a diversity of additional helpful resources and tutorials on making R packages. We list a few below: